

Step 13: Glue the upper end of the magnet wire to the metallic ball, then attach the ball to the coil.
And here are our results:
Step 12: Create the top part of the coil using a plastic ball and aluminum foil, wrapping it around.
Step 13: Glue the upper end of the magnet wire to the metallic ball, then attach the ball to the coil.
And here are our results:
At this stage, we can test what we have done with our coil. Connect the battery to the adapter and turn it on. Bring a bulb close, and you should have something like this:
Step 12: Create the top part of the coil using a plastic ball and aluminum foil, wrapping it around.
Step 13: Glue the upper end of the magnet wire to the metallic ball, then attach the ball to the coil.
And here are our results:
Step 11: Solder the red wire from the connector to the middle leg of the switch and the black wire to the left leg of the transistor.
At this stage, we can test what we have done with our coil. Connect the battery to the adapter and turn it on. Bring a bulb close, and you should have something like this:
Step 12: Create the top part of the coil using a plastic ball and aluminum foil, wrapping it around.
Step 13: Glue the upper end of the magnet wire to the metallic ball, then attach the ball to the coil.
And here are our results:
Step 10: Create a bridge from the resistor to the switch.
Step 11: Solder the red wire from the connector to the middle leg of the switch and the black wire to the left leg of the transistor.
At this stage, we can test what we have done with our coil. Connect the battery to the adapter and turn it on. Bring a bulb close, and you should have something like this:
Step 12: Create the top part of the coil using a plastic ball and aluminum foil, wrapping it around.
Step 13: Glue the upper end of the magnet wire to the metallic ball, then attach the ball to the coil.
And here are our results:
Step 9: Create a bridge from the other end of the wire (top part of the image) to the resistor.
Step 10: Create a bridge from the resistor to the switch.
Step 11: Solder the red wire from the connector to the middle leg of the switch and the black wire to the left leg of the transistor.
At this stage, we can test what we have done with our coil. Connect the battery to the adapter and turn it on. Bring a bulb close, and you should have something like this:
Step 12: Create the top part of the coil using a plastic ball and aluminum foil, wrapping it around.
Step 13: Glue the upper end of the magnet wire to the metallic ball, then attach the ball to the coil.
And here are our results:
Hello friends, in this new post we want to explain how to make the famous Tesla coil, that project we all went through during our student days. Let’s remember that the Tesla coil was patented in 1891 by the inventor Nikola Tesla. The first coils were made with a 15 cm by 20 cm glass accumulator jar, which was wound with 60 to 80 turns of 18 AWG copper wire. Tesla’s intention was to demonstrate that electric energy could be transmitted without the need for conducting wires. Now that we’ve refreshed our memory, we can begin the construction of the Tesla coil. For that, we will need this list of materials:
Materials List to Build a Tesla Coil
- 1 wooden board, 17.5 cm x 8 cm
- 1 9V battery
- 1 9V battery connector
- 1 2N2222A transistor
- 1 22K resistor
- 1 switch
- 1 tube, 8.4 cm long x 2.2 cm wide
- 1 mm thick wire, 15 cm long
- 0.5 mm thick magnet wire
Step 1: Wind the magnet wire around the tube without leaving gaps between the turns.
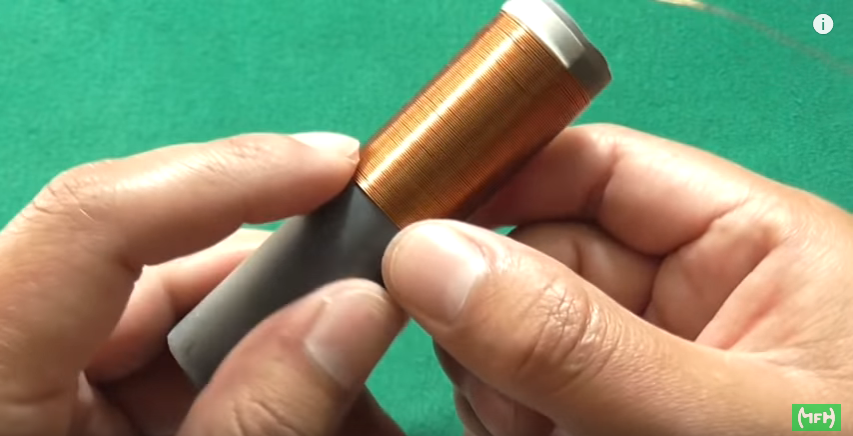
Once most of the tube is covered, we should leave a section without winding, which we will use later. Step 2: Attach the 2N2222A transistor to the wooden board.
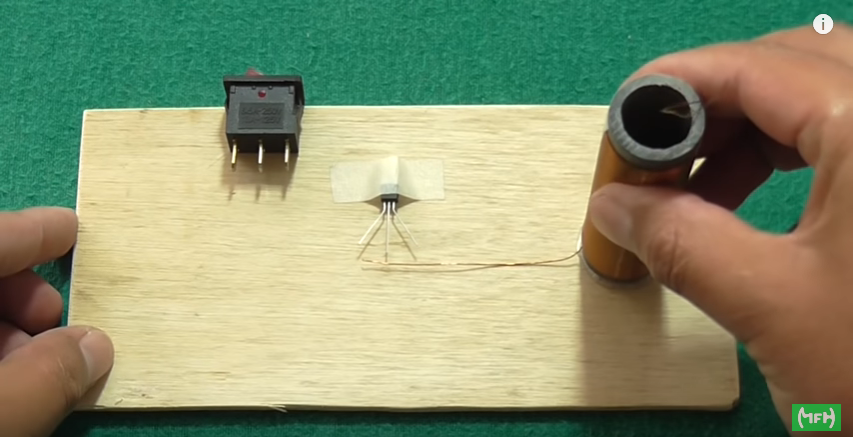
Step 3: Attach the switch to the wooden board.

Step 4: Attach the coil to the wooden board.
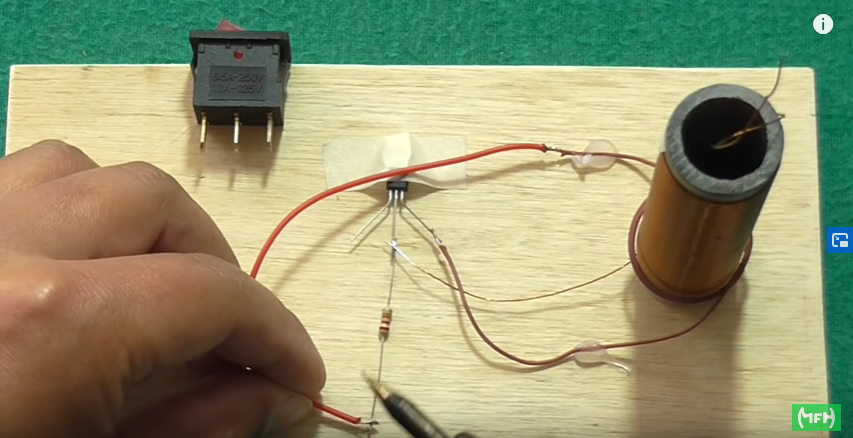
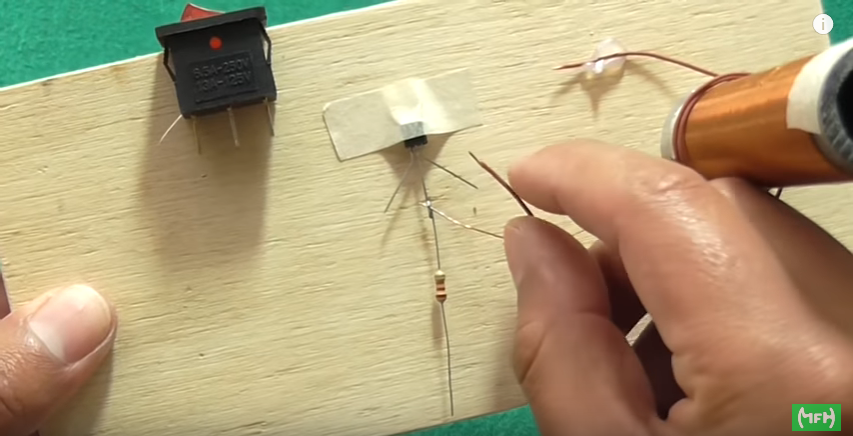
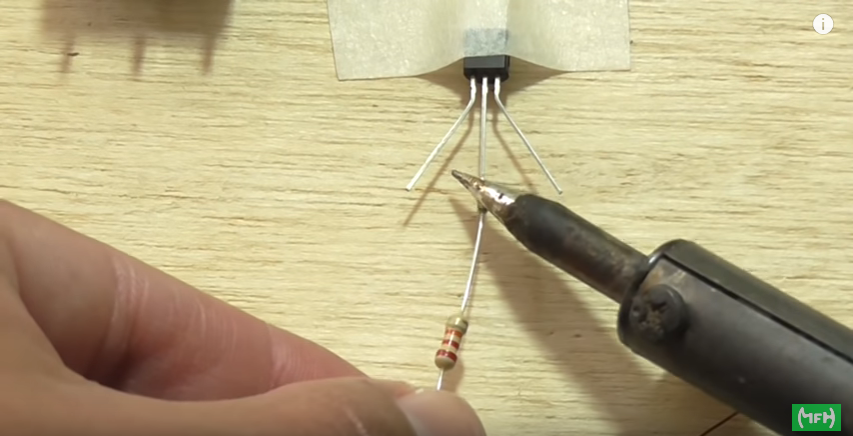
Step 5: Solder the 22K resistor to the center leg of the transistor.
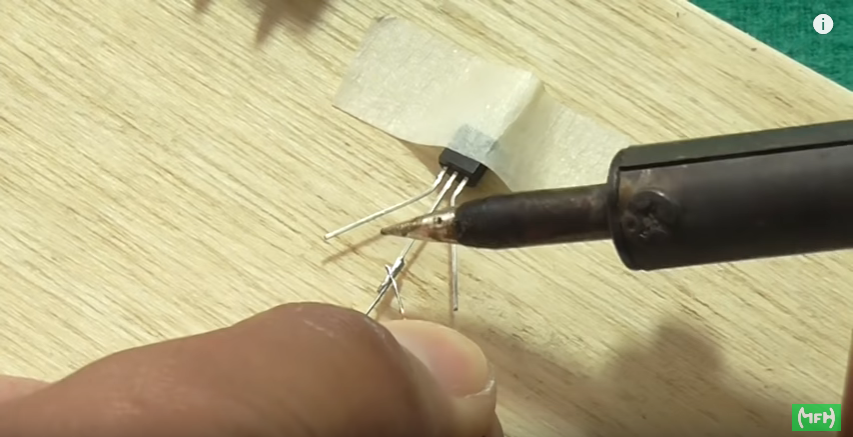
Step 6: Solder the wire from the bottom of the coil to the center leg of the transistor.
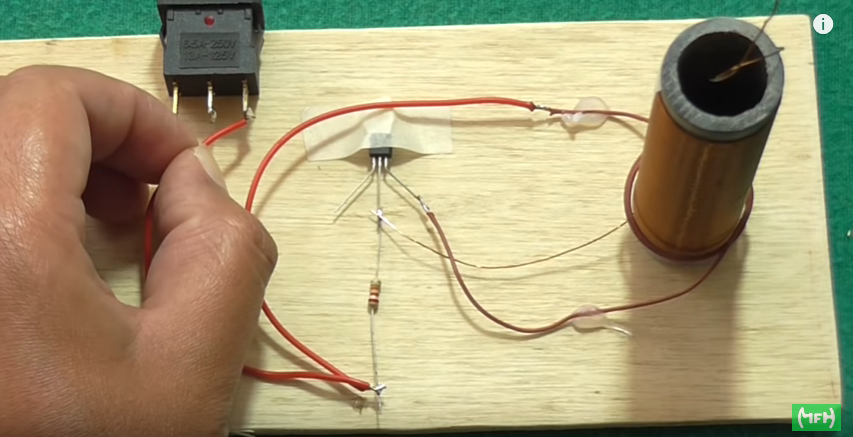
Step 7: Attach one end of the 15 cm wire to one side of the board, make two turns around the coil, and attach the other end to the other side of the board.
Step 8: Solder the tip of the wire (from the bottom in the images) that surrounds the coil to the right leg of the transistor.
Step 9: Create a bridge from the other end of the wire (top part of the image) to the resistor.
Step 10: Create a bridge from the resistor to the switch.
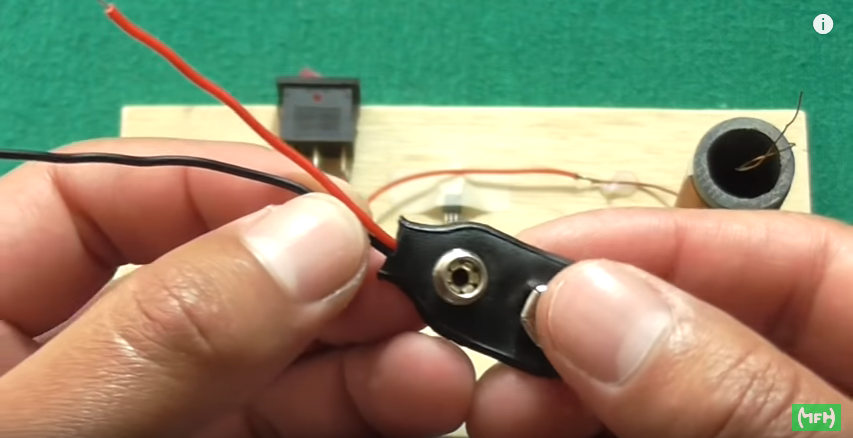
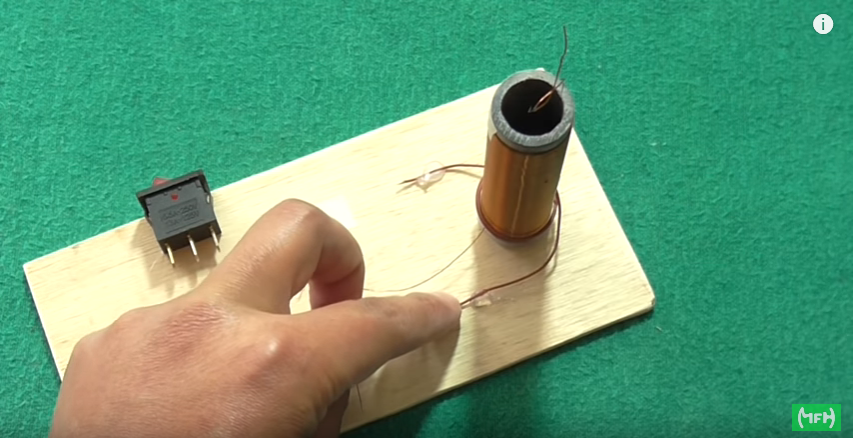
Step 11: Solder the red wire from the connector to the middle leg of the switch and the black wire to the left leg of the transistor.
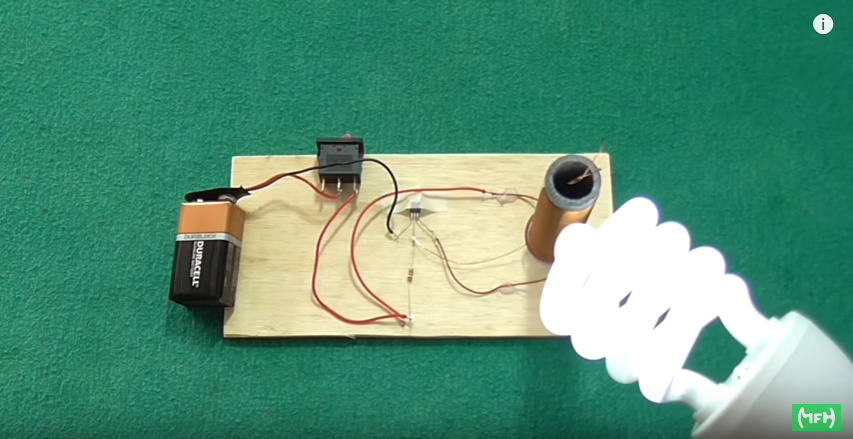
At this stage, we can test what we have done with our coil. Connect the battery to the adapter and turn it on. Bring a bulb close, and you should have something like this:
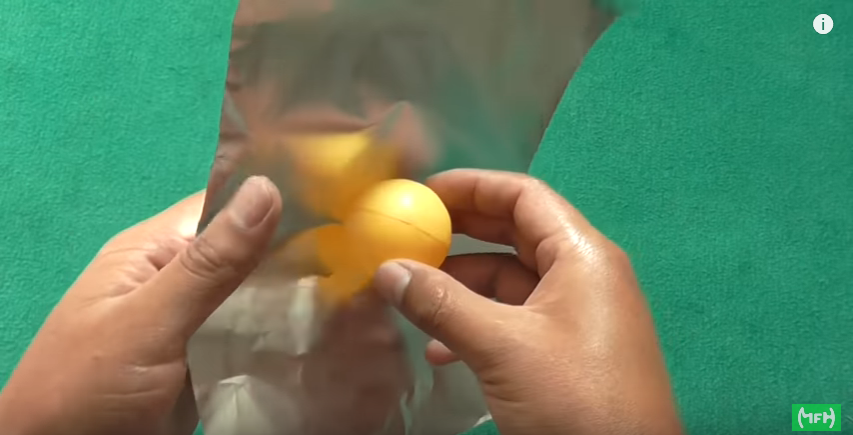
Step 12: Create the top part of the coil using a plastic ball and aluminum foil, wrapping it around.
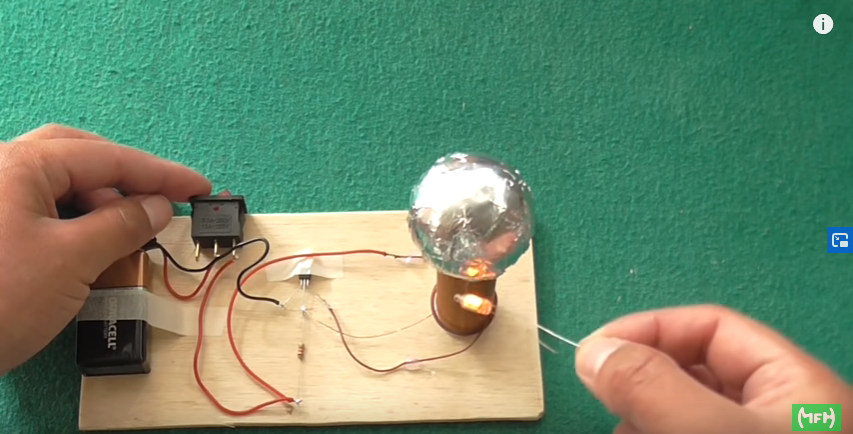
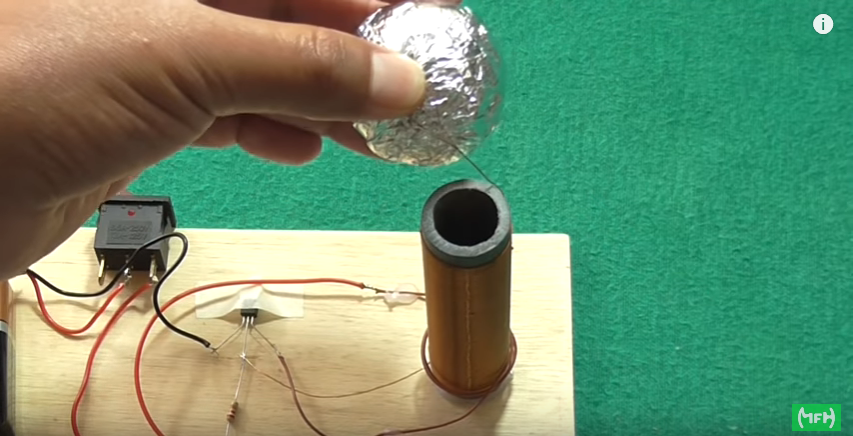
Step 13: Glue the upper end of the magnet wire to the metallic ball, then attach the ball to the coil.
And here are our results:
Hello friends, in this new post we want to explain how to make the famous Tesla coil, that project we all went through during our student days. Let’s remember that the Tesla coil was patented in 1891 by the inventor Nikola Tesla. The first coils were made with a 15 cm by 20 cm glass accumulator jar, which was wound with 60 to 80 turns of 18 AWG copper wire. Tesla’s intention was to demonstrate that electric energy could be transmitted without the need for conducting wires. Now that we’ve refreshed our memory, we can begin the construction of the Tesla coil. For that, we will need this list of materials:
Materials List to Build a Tesla Coil
- 1 wooden board, 17.5 cm x 8 cm
- 1 9V battery
- 1 9V battery connector
- 1 2N2222A transistor
- 1 22K resistor
- 1 switch
- 1 tube, 8.4 cm long x 2.2 cm wide
- 1 mm thick wire, 15 cm long
- 0.5 mm thick magnet wire
Step 1: Wind the magnet wire around the tube without leaving gaps between the turns.
Once most of the tube is covered, we should leave a section without winding, which we will use later. Step 2: Attach the 2N2222A transistor to the wooden board.
Step 3: Attach the switch to the wooden board.
Step 4: Attach the coil to the wooden board.
Step 5: Solder the 22K resistor to the center leg of the transistor.
Step 6: Solder the wire from the bottom of the coil to the center leg of the transistor.
Step 7: Attach one end of the 15 cm wire to one side of the board, make two turns around the coil, and attach the other end to the other side of the board.
Step 8: Solder the tip of the wire (from the bottom in the images) that surrounds the coil to the right leg of the transistor.
Step 9: Create a bridge from the other end of the wire (top part of the image) to the resistor.
Step 10: Create a bridge from the resistor to the switch.
Step 11: Solder the red wire from the connector to the middle leg of the switch and the black wire to the left leg of the transistor.
At this stage, we can test what we have done with our coil. Connect the battery to the adapter and turn it on. Bring a bulb close, and you should have something like this:
Step 12: Create the top part of the coil using a plastic ball and aluminum foil, wrapping it around.
Step 13: Glue the upper end of the magnet wire to the metallic ball, then attach the ball to the coil.
And here are our results: